In this post, I’m going to highlight some tips that make editing in 3DShoemaker easier to do.
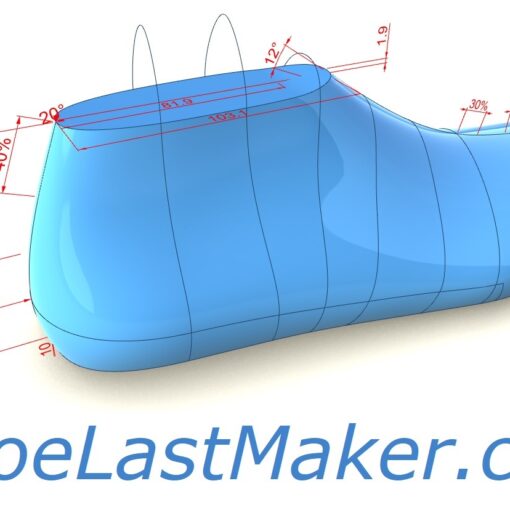
Tip 1: The first tip relates to a new feature added in V1.008 of 3DShoemaker. And that is to limit the types of dimensions that are visible at any given time. This is a really useful addition, as otherwise the number of dimensions visible can be daunting. When working on a complex curve, particularly the last bottom edge, I suggest only showing one type of dimensions at a time. The different dimension types are: linear, control point spacing, angular, radial, and annotation. You can choose which to show via the options form.
Tip 2: Once you are familiar with the various curves that can be edited, you might trying editing more than one curve at a time. This is particularly useful when trying to ensure similar parameter numbers for adjacent curves. Editing multiple curves at a time can be done by selecting multiple curves and then pressing the edit button, or vice versa and then right clicking or pressing enter.
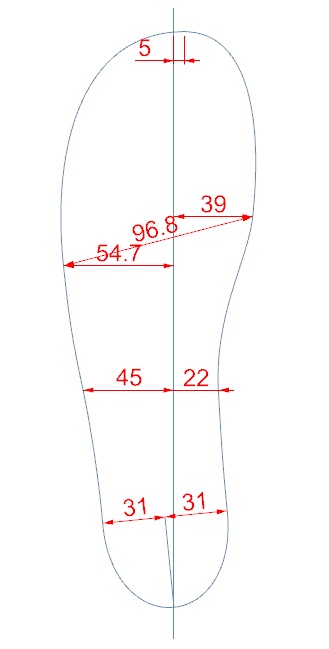
Tip 3: Always make sure you are editing parameters from the most advantageous curve. For instance, the quadrant heights of the heel cross section curves can be edited from the plane of the heel cross section, or from the shoe last wall curve. And if you are at the stage of trying to ensure a smooth shoe last surface, you’ll want to edit from the shoe last wall curve to see the relationship with quadrant heights for other cross sections. Another instance where this is important is the offset distances from the orthotic insole spine to the central axis.
Tip 4: Try turning on ‘Show Surfaces when Updating’ and turning off ‘In Plane Editing’. This provides a perspective view of the resulting shoe last each time you press ‘Update’. While this does slow down the time it takes to update, you might find the more immediate feedback helpful when working to get a smooth shoe last surface. In the case of inserts and bottoms, this should be done in conjunction with the option to build their bodies.
Tip 5: Use the Clipping Planes to check surface smoothness. This is a powerful tool for spotting bumps and concavities you wouldn’t otherwise notice. Make sure to try all the various planes to see which one works best.
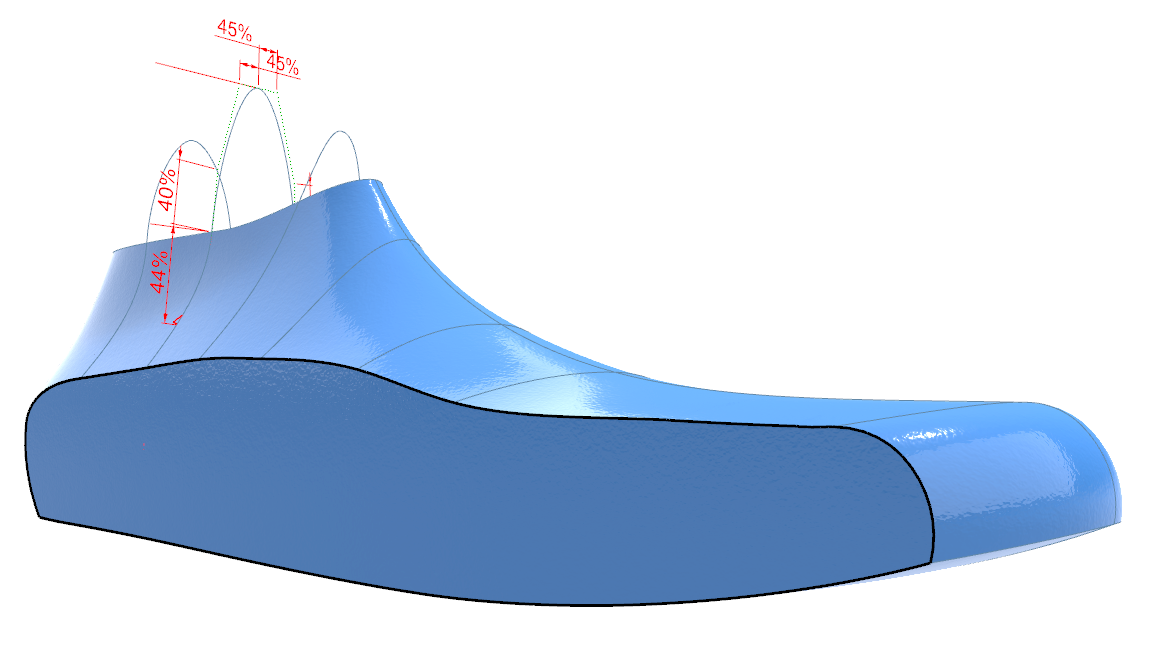
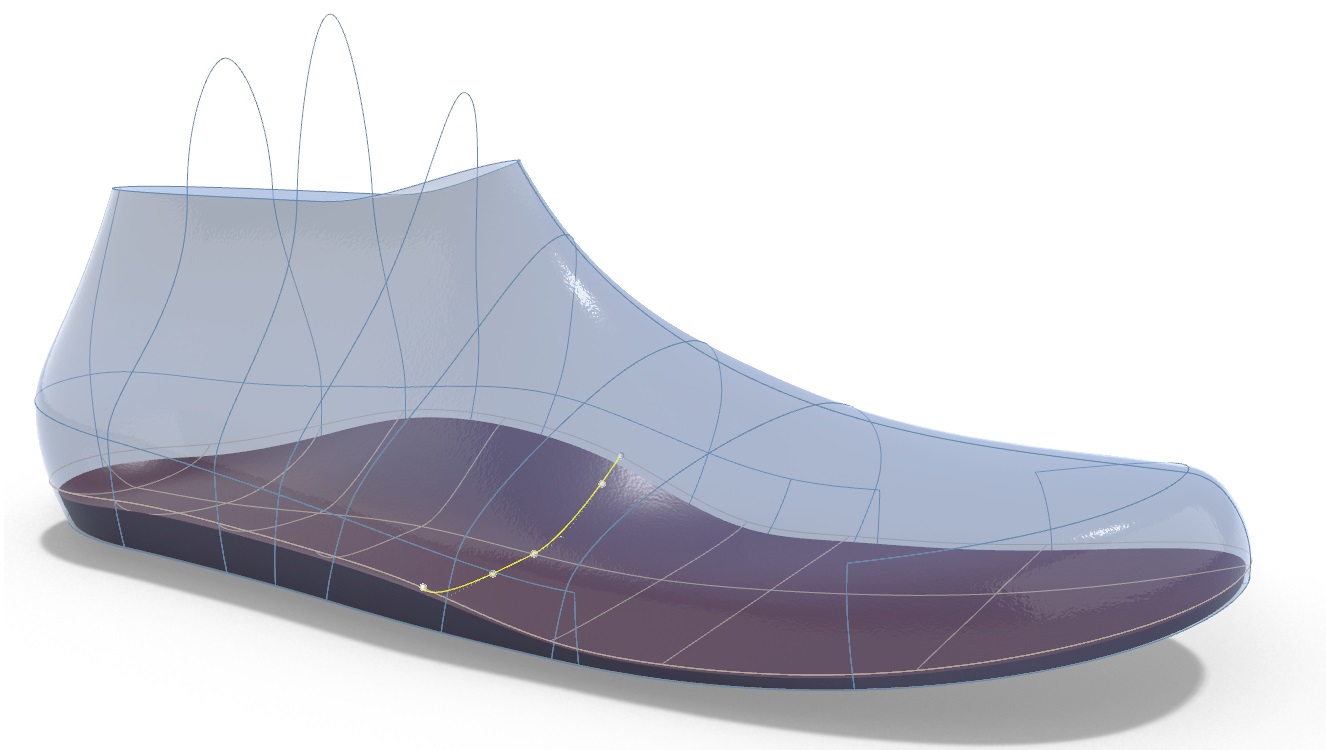
Tip 6: Set ‘Last Transparency’ to be able to see some parameters that would otherwise be blocked by the shoe last surfaces. This comes in handy when ‘Show Surfaces when Updating’ is turned on, when you are working on a insert (orthotic insole) template, or when you have a 3D foot model in the session.
Tip 7: View the shoe last as you are most familiar. Some people who have worked on physical shoe lasts may find it more familiar to view the shoe last from the bottom, and possibly vertically in their field of view. Both of these options can be selected in the options form.
Tip 8: Learn to change parameters most efficiently with a keyboard and mouse combo that works for you. Me personally, I tend to only use my right hand. First I left-click the Edit Button. Then I click the parameter curve(s) I want to edit, then right-click. Once the parameters are up, I left click the one I want to change. Then I shift my right hand to the number pad and type the new number, using my baby finger to press the enter key. I edit any other parameters necessary and then click update.